
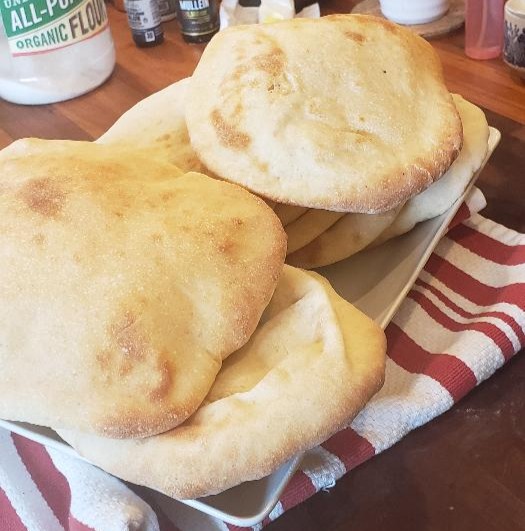
Fresh, simple, magical, flavorful pita bread. Making it at home is actually pretty easy and fun, as these tasty breads puff up to present the perfect vessel for your favorite filling or as a healthy dipper for your homemade hummus.
This pita is based on a master recipe by Dimitra’s Dishes. You really have to check out her site and her YouTube channel. Outstanding content. Thank you, Dimitra!
Dimitra’s pita recipe is soft and easy to make. I wanted to adapt it to use my leftover sourdough starter, so below is what I did.
I served these with lamb koftas, lettuce, tomatoes, pickles, hummus, and lemony yogurt. And, they all made puffy pita pockets!
It does take some time to mix and then roll and bake in the air fryer, but the results are worth it. Plus, they freeze great.
Ingredients and Method
DRY
- 700 grams AP flour (probably 4 ½ C or more)
- 2 t salt
Mix these above dry ingredients together and set aside.
LATER: For prep and rolling you will need another cup of flour in a bowl. Might as well get that set aside while you have your flour out. 😊
WET
- 50-60 grams (1/3 C) leftover sourdough starter (feel free to use more, just adjust your flour to make a nice, tacky dough)
- 1 C (250 ml) tap water
- 1 C (250 ml) warmed milk (about 115 F)
- 2 T olive oil plus more for coating your bowl
- 1 T sugar
- 1 ½ t yeast
Mix all the wet ingredients together in a stand mixer (or bowl), adding the yeast last.
THEN
Add the dry ingredients to the wet ingredients and mix slowly at first, then to setting 4 (on KitchenAid) for 12 minutes. If hand kneading, you should knead for 15-20 minutes in a bowl—lap and fold it, as it won’t be firm enough to put on your board and knead like regular bread.
The dough should be wet and tacky. You may need to add more flour, but err on the side of tacky. This will not be a firm dough like bread dough.
Coat a large bowl with olive oil and turn your dough into the bowl, turning to coat it on all sides. Cover and set aside to rise for about 1 hour or until doubled.
Divide into 10-12 portions and form into balls. Set aside covered.
Put a good amount of flour into a bowl (which you already did) and dip each ball in flour, coating it well. Roll each into a round approximately 6-8 inches in diameter. Set aside on a tray and cover with a towel to allow to rest and rise. By the time you are finished rolling the last pita, your earlier ones are ready to be baked.
Set your air fryer to 400 F and bring to temp. Place your earliest pita on the rack or surface (no greasing needed). Cook for 4 minutes or until it puffs and begins to color. You can turn these over, but I found that it usually deforms the pitas. It is OK if one side is nicely golden and other is not. (No one cares!)
You can also do these in an oven at 400 on larger trays to save time, rather than doing them individually.
Transfer to a platter. They will be puffed still, but will deflate, especially when you begin to stack them.
These are great when freshly baked. It’s OK if you have to wait, as they will still be wonderful. Note: even though they puffed up nicely when first baked, if they set a bit, the layers might stick together. Just take a knife and separate them.
Stay briny,
–Stacey
